To use the option "Scan to mobile", mobile device and ScanSnap have to be connected:
- * Click on "Scan to mobile" on the computer: a message appears. Click the (OK] button to open the dialog box.
- * You have to set a password to connect the scannner to your mobile device: please use the default password 2724.
- * Windows security alert message: click on [OK].
- * Install ScanSnap Connect Application on your mobile device. (Download from an application store such as iTunes, the App Store or Google PlayApp.)
- Connect your mobile device to the WIFI „Bookeye“ (no password required; if connection fails, turn Bookeye-Scanner off and on again).
- Open app.
- Wait for connection.
- * Enter password (rf. 2).
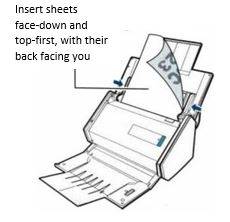
- Insert document in ScanSnap Document Scanner.
- Select „Scan“ in your app or push blue [Scan] button on ScanSnap.
- Scan will be transferred to your mobile device.
The steps marked with * are only necessary for the first launch. For future scans, you don't have to log on the computer; just open the app on your mobile device.


